Hey there, I'm Tye Beasenburg with Palmetto State Armory. And today, we're going to be learning how to build your AR-15 lower receiver in the first of our how-to series with our friend Hank Strange. First of all, I want to thank Tye and everyone else at PSA for inviting me in here. If you've never put together or assembled an AR lower before, don't worry about it.
That's why we're doing this video. We're going to walk you through it. Step-by-step starting with the tools you're going to need here.
AR-15 Parts & Tools List:
- Standard drive punch set, SKU - 5165493397
- Four-piece specialty AR-15 toolkit, SKU - 5165493398
- AR-15 Bench Block, SKU - 506608
- Vice block, SKU - 778132
- AR Armorer tool, SKU - 778127
- AR-15 Lower Build Kits
- AR-15 Lower Receivers
The Tools [00:00:36]
I have an eight-piece drive punch set, a four-piece specialty AR-15 toolkit, and a four-piece roll pin holder punch set. In case we miss anything here, or you guys want to see a parts list, look in the description. We've got everything listed out there.
Continuing on with the tools here. We've got a AR-15 bench block, as well as a PSA vice block. We've got a PSA Armor's AR-15 tool as well as a hammer. And then we have a bit set and screwdriver. If you have access to one vice as a nice tool to have as well.
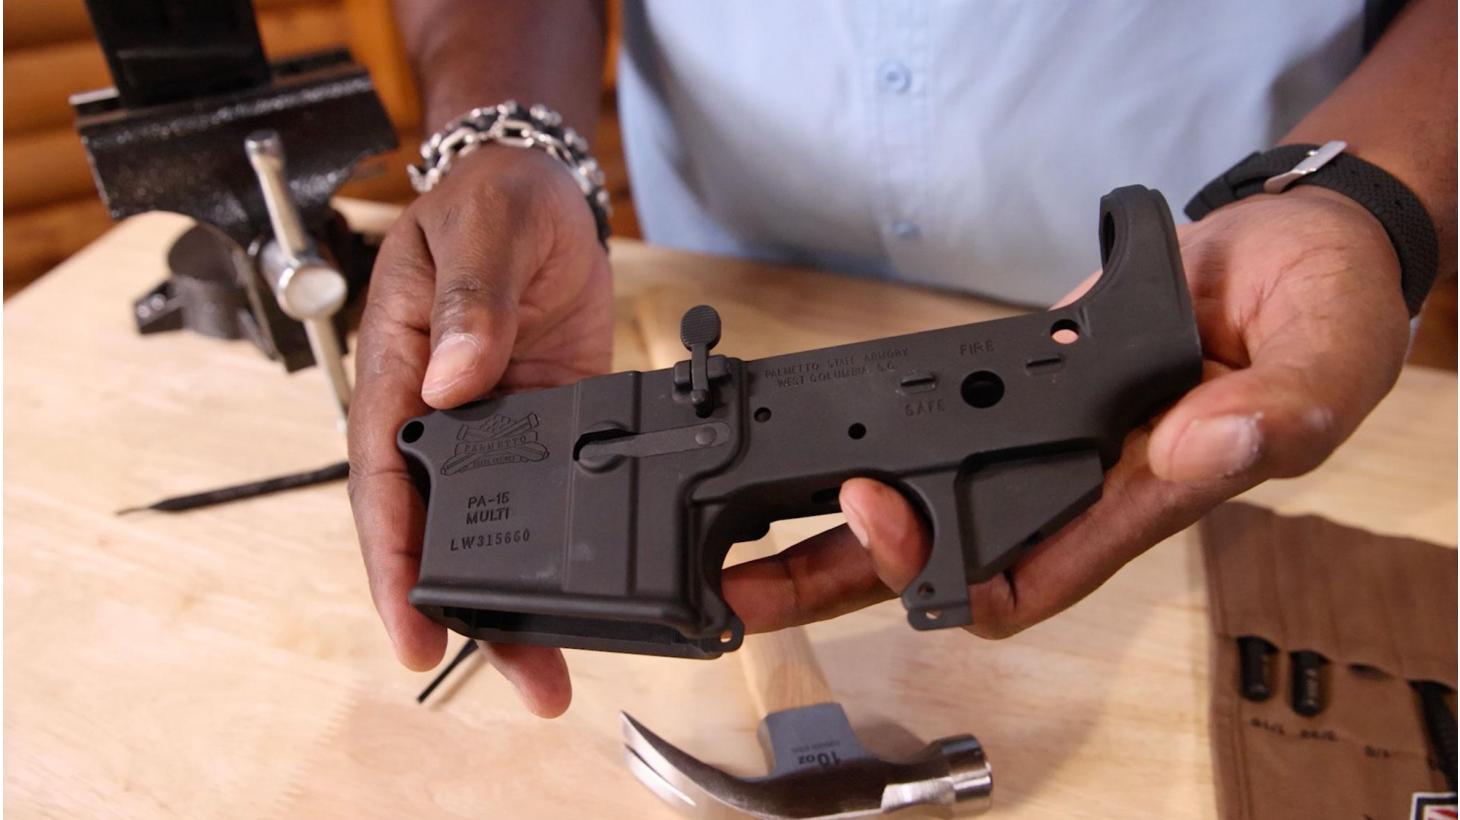
The AR-15 Lower Receiver [00:01:15]
First thing you need to get this assembly kicked off is a lower. This is an AR-15 lower it's going to need to go through your local FFL dealer, you can buy this online at PSA and have it delivered to them. Now to begin putting your lower together, you're going to need an AR-15 lower parts kit. You can get a complete one from PSA as well. Here it goes. Okay. So this is just a standard lower build kit off the website, and looking inside, this is the lower parts assembly kit that you're going to need.
Here's your fire control group. MOE trigger guard. There's also a pistol grip inside of here. MOE Magpul stock and your buffer tube assembly.
Step 1: Installing the Magazine Release [00:02:04]
So for our first official step, we're going to put in the magazine release. So we need to go into the lower parts kit. So here we have the entire contents of the lower parts kit.
We're going to start with magazine release. We're going to start with our bench block and I'll Delrin tool from the specialty toolkit. So here's the mag release, the mag release spring and the button. All right.
So we want to drop the magazine release in on this side of the lower flip it over. And then the spring in this case, I don't think there's any particular way it goes on, but you can drop that on top here.
So the thing you want to make sure with the button here, when you're putting it on is the groove side should be up and facing you. All right, you want to get this. Turn this a couple of times until it catches, then flip it over.
So basically, our Delrin tool's gonna come into use here, and it goes into this little hole here on the button, push that up, and then we're going to wind the magazine release clockwise a few times. Let's see, I'm going to go one more and then let it settle down there and then test it to see if that works. So we want to keep winding it until we get the screw side of the magazine release flush here. So we'll keep going probably a couple more times. One more. I think one more should do, maybe one more. There we go. That's nice and flush.
Step 2: Installing the Bolt Release [00:04:03]
Next, let's go to the bolt release and open up the package. All right. So here's a bolt catch, detent spring, and pin. All right, so let's start by bringing up some tools. So we'll bring up a punch set here, a few roll-pin holder punches. From the set and you're going to need a good hammer to do this.
I know some folks will probably be worried about marring up the lower. In that case, I would recommend getting a brass hammer. You can get that on the PSA website and then using some masking tape. So I'm going to put the roll pin into the roll pin holder. This is always awkward to capture on camera. So we're just going to get this started.
We really recommend that you guys take your time to do this. Hopefully, for you, you won't be making a video at the same time.So now we're going to drop in the spring, the detent and then put the bolt catch in. Okay. We're going to drop the spring in, and then we're going to drop in the detent with the smaller end going into the spring, and then we're going to put the bolt catch on.
So just a little trick that I'm going to use here to hold that this whole assembly in, until I drive the pin all the way home, I'll use this removal tool just to hold that in there so that the bolt catch doesn't come out. And then I will drop it on the vice block here and I will use the three-sixteenths to hammer this all the way in so that way, it'll catch.
To drive that pin in, I'm going to switch to the one eighths here just to drive it all the way home.
You want to make sure that you get this to sit flush. Okay. All right. So we could take this off here. It's pretty much in it's doing good. And if you found that you've marked up your lower here, you can always use a permanent marker to get out any scratches or blemishes.
Step 3: Installing the Front Pivot Pin [00:06:42]
This one looks pretty good and now actually going to do is go to the front pivot pin. So this is the bag with the front pivot. This longer flat one will be your front pivot, and then you can use either spring and the detent.
And we're going to need a few specialty tools out of the specialty toolset. To get this done. So with the punch removal tool, you want to bring this out and line up your holes. You can actually just use it to line it up right there. And that way you can tell that it's lined up. And then the first thing you want to do is put the spring in, that goes in, and then you want to put your detent in.
Also, we want to push the detent in with the tool and then pivot this up as well like this 90 degree angle. Okay. And then you can actually remove that, and now comes the dance. All right. So here we go—the delicate dance.
There we go. So now once you get that in, you can wiggle it around. I heard it click that's in place now. All right. So we just want to test the function, push it in and pull it back out.
Next step, we're going to install the trigger guard. All right.
Step 4: Installing the Trigger Guard [00:08:06]
So here we go. We've got a Magpul Moe trigger guard that we're going to install. So there you go. There's a trigger guard and then you've got a screw and a pin.
First thing, we're going to do is put it in the trigger guard using the set pin screw. We'll use our Allen key for that. One of the things you want to be careful of here is not to break these ears when putting back on the trigger guard, and we're going to use the bench block for that, make sure that it's properly supported when we hammer in this pin.
Next, we're going to install our trigger. So we need to get all the trigger parts. What we're going to do here is put the trigger and the trigger spring together, this flat shelf, part of it facing up. Next, we'll put in the disconnector spring. And that goes in with the fat part of the spring facing down.
And there's a hole here that it goes into the whole. Then take the disconnector. It goes in, and it sits something like this. Now we're going to take the lower here, back to the block, and we're going to drop our trigger in right here. Here's where the trigger pin install pin tool comes into effect. I'm going to put it in here and at the same time, push down on the trigger.
That goes all the way through and holds it. Now, we're going to take the trigger pin and push it through here, pushing this point out. You may want to use a mallet for this.
So next, we're going to do the hammer and hammer spring with the ears pointing down. So with the legs of the hammer spring, laying down and going on top, you want to push this in and back.
So once we get this install pin in, we want to let the hammer go back. We don't want to lock it back and have it accidentally release and slam into this part of the receiver. Make sure to be careful. Now I'm going to push this pin into the side and use the rubber mallet.
With that pin installed. Now we're going to cock it. Make sure the trigger doesn't release and have this hammer slap the receiver. First thing I'm going to do is flip the lower and open up the safety parts, including the safety spring and detent. Now we're going to open up the pistol grip. This is the pistol grip and the screw that secures it down along with the bottom cover.
I'm going to take this to show you when putting on the safety, it's always going to be on the same side as your bolt release. Now, what we need to do is drop in the spring and detent for that, that goes into this hole on the opposite side. I'm going to drop the spring into here and then turn it upside down.
And we want to make sure it's going into the same hole that the detent spring went into. We can use the rubber mallet to help with that.
Now we're going to drop in the retaining bolt and tighten that up.
Now, we'll put the cover on, and we'll take this off. Now making sure you don't release the trigger onto the lower. I'm going to put my hand here in the way to test everything. It's on safe. I'm going to take it off that and carefully release it. Now I'm going to test it a couple of times.
Step 5: Installing the Rear Takedown Pin & Buffer Tube Assembly [00:11:43]
So we're nearing the end. Now we just need to put in our rear takedown pin and then buffer tube assembly. Okay. So we're going to install our buffer tube assembly. So for that, we need the buffer tube, the spring buffer. We need our castle nut backing plate as well. And I just need my AR-15 tool.
So here's our takedown pin, spring, and detent.
So the detent pin is going to go in here. We're going to put a spring in behind that. So next, we need to go to the buffer retaining pin, which has a spring that goes along with it. So the next step here, I'm going to install the spring and the retainer pin. Now the following step is going to be putting on the buffer assembly.
Next, we need to put on the castle nut, large cuts, go to the back, and we just need to thread that all the way on. Okay. Until it's loose like that.
So next, the latch plate goes on and. We need to make sure that the dimple is facing out towards the receiver because it fits in right here. So I'm going to thread this on until it fully engages this retaining pin. And it's captured, I'm just going to put my finger on it there to keep it down.
Okay, so now I'm going to thread the castle nut back on while having the latching plate engage the spring, but we don't want to damage that spring. We don't want to crank it up. So we need to be very careful with that.
Takedown pin. So we just want to rotate that until it clicks, pull it out. So next, we're going to put in the buffer spring with the spring end, going in first and then the buffer going behind it. And we're just going to push it in here and get it passed the retention pin there. Good to go. So now we need to put on a Stock.
Step 6: Installing the Stock [00:14:07]
We chose the Magpul Moe stock here. And this is relatively simple to put on. I'm just going to start it on the back end here, and you want to pull up the release and then pull down on this pin, push it all the way in, and it's captured. You're good to go now. The final step, take it off. You can test it a couple of times. Remember I said, make sure you don't slap the lower. So we can test that safety.
And we're done. There you go. Tye. Now we have a complete PA 15 lower for a complete parts and tools list. See the description below. And if you have any questions, hit us up in the comment section.